Baked oats are the breakfast cake you didn’t know you needed. Barring a smidge of baking powder, you don’t use anything other than what you’d normally add to an average bowl of hot oatmeal. Finally, oatmeal that doesn’t totally suck. But there’s also a baked oat for those with a higher standard than “doesn’t totally suck.” Level-up your baked oats and make PB&J bars.
There are no tricks to baked oats. Oats make up the bulk of the recipe, in flour form, and the other ingredients double-task as binders and flavor components. The mixing method is straightforward and you don’t need any special equipment.

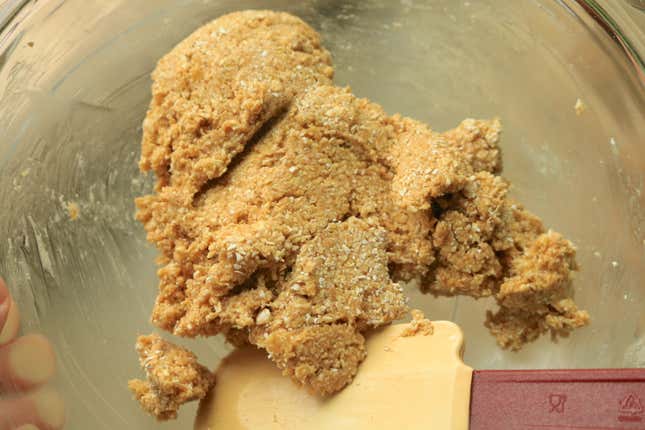
These peanut butter and jelly bars can be shaped and cut to a size that fits your preference. For a snack, press the dough out thinner, and cut the bars smaller. For a sturdy breakfast on-the-go, build a thicker base layer, or cut the bars into larger slabs. Oat flour goes in a medium bowl first. You can use store bought oat flour (for a smoother base), or make your own quick oat flour in a food processor. I usually keep one of those cardboard tanks of rolled oats around and whiz it in the processor until I get a mostly fine texture. A bit of coarseness doesn’t bother me, and adds a nice knobbly finish. Add a couple tablespoons of creamy peanut butter and honey, drop in a single egg, and add a dash of salt and splash of vanilla extract. These six ingredients get mixed into a thick dough, then pressed into a dish with a wooden spoon.

Prepare an 8×10-inch (or smaller) baking dish. You can either smear a thin layer of butter in the dish, or use parchment paper to keep the bars from sticking. Divide the dough in half-ish—one portion should contain slightly more dough, a portion about the size of a ping pong ball. I eyeball-it and use the spoon or my hands to separate the two portions, one for the base and one for the crumbled top. The slightly heftier hunk is for the base layer.
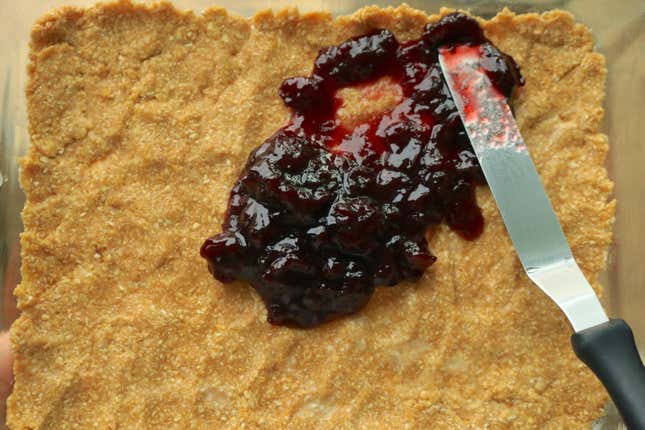
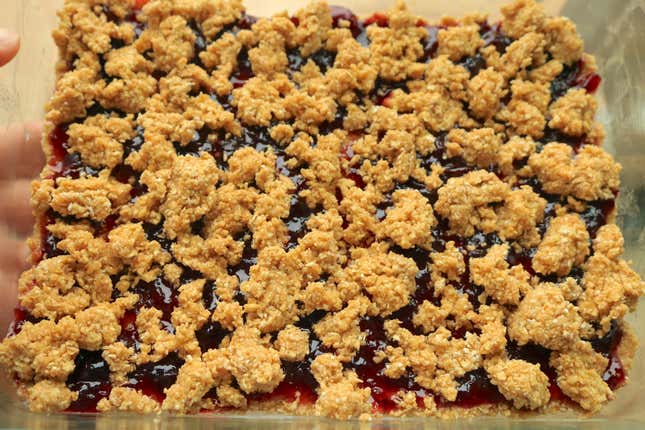
Press the base portion of the dough evenly into the bottom of the prepared dish. If the dough is sticking to your fingers, dampen them. Bring a little bowl of water over and periodically dip your fingers in the water. Use the back of a spoon or an off-set spatula to thinly spread jam onto the base. Top with the other portion of dough, crumbling it with your fingers as you sprinkle to make a cobbled topping. Bake in a 350°F oven for 20 minutes, or until the jam is bubbling and the crumbled edges begin to brown.

Let the bars cool completely, or even chill them in the fridge before cutting. I used an 8×10-inch Pyrex baking dish and cut it into 12 bars for snacking purposes, but you can cut them into larger bars if you want to use them for a meal-prepped breakfast on-the-go. Store them in an airtight container in the fridge for about a week. These bars have great flavor the day they’re baked, but they taste even better the next day.
Baked Oat PB&J Bars
Table of Contents
Ingredients:
- 1 ¼ cup of oat flour
- 2 tablespoons smooth peanut butter
- 2 tablespoons honey
- 1 egg
- 1 teaspoon vanilla
- ½ teaspoon salt
- Scant ½ cup jam (I used Bonne Maman cherry preserves)
Preheat the oven to 350°F. Lightly butter an 8×10-inch baking dish, or line it with parchment paper (or both).
In a medium bowl, mix together the first six ingredients with a wooden spoon until a thick dough forms. Divide the dough almost in half, with one slightly bigger portion. Press the bigger “half” into an even layer on the bottom of the baking dish. (Use a bit of water to dampen your fingers if the dough is too sticky.) Spread the jam evenly over the base layer. Crumble the remaining dough over the top of the jam layer and gently press the crumbles into the jam to ensure good contact.
Bake at 350°F for 20 minutes, or until the jam is bubbling on the edges and the edges of the crumble begin to brown. Let the bars cool completely before cutting. Store remaining bars in an airtight container in the fridge for up to a week.
