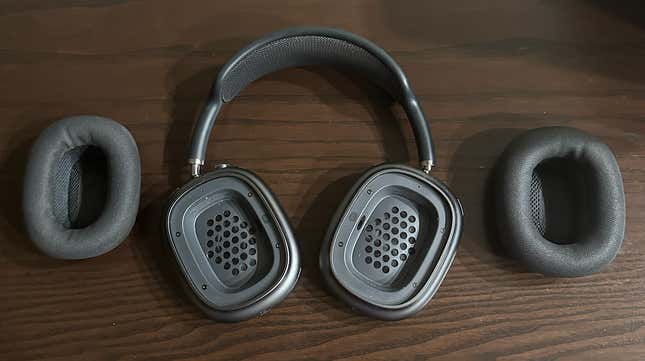
You need to wash your AirPods Max headphones. I know this because I recently needed to wash mine after an incident during which my coffee spilled in my bag and damaged many of my personal possessions. For obvious and personal reasons, I will not be discontinuing the practice of carrying my coffee in my purse when circumstances demand it, but I will be washing my Apple headset more often because, as it turns out, it was disgusting. Here is what I did and what you should do, too.
Preparing to wash the AirPods Max
Table of Contents

Apple is very clear about the most important part of washing your Airpods Max and so I will be too: Don’t run them under water. Don’t soak them in water. Don’t get them very wet at all, actually. It is a holy miracle that the coffee didn’t ruin mine; don’t tempt fate any more than you have to.
Instead, you’ll be doing a lot of delicate work by hand, far away from your sink. Start by gathering your supplies: liquid laundry soap, two lint-free cloths, a container, and a little water. Next, you’ll notice that the ear cushions of your headphones pop out of the headband and are actually held there by magnets. Go ahead and remove them. They’re probably dirtier than your typical pleather or vinyl ear cushions, as these are made of foam and mesh, so makeup, sweat, hair products, and general ickiness can seep in.
Cleaning the electrical part of the AirPods Max
For the metal, tech-y part, all you need is a slightly damp cloth, which you’ll run over the outer and inner parts of the sections that go on your ears. Do this part carefully, getting in all the crevices while avoiding getting any liquid into the openings, like the holes that facilitate the sound or the port where you charge them. If the exterior part of the headphones is really dirty, use a disinfecting wipe or 70% isopropyl alcohol wipe to gently rub the surface. Just don’t let it touch the knit part of the headband and don’t use anything with bleach or hydrogen peroxide.
Use a dry cloth to go back over all the spots you wiped and be sure not to attempt to use them until they’re completely dry. While brushes and hard tools may be useful for cleaning the earbud version of AirPods, please avoid using anything like that on your over-ear headphones, as they’re made of anodized aluminum and are just generally a little more finicky.
How to clean the AirPods Max cushions

This is the part that was most important to me, as my cushions stank of Dunkin’ Donuts and were wearing a full layer of foundation ripped off my own face. The headband, too, was appalling, and as it’s also made of mesh, it gets cleaned the same way the cushions do. I’ve seen some other guides that recommend using a SIM extractor tool to pop the headband off the electrical parts completely, but I’m not even going to tell you how to do that because Apple doesn’t recommend it and the risk of not attaching it all correctly again is too great. As long as you don’t get any wetness from the band onto the metal part, you’ll be fine.
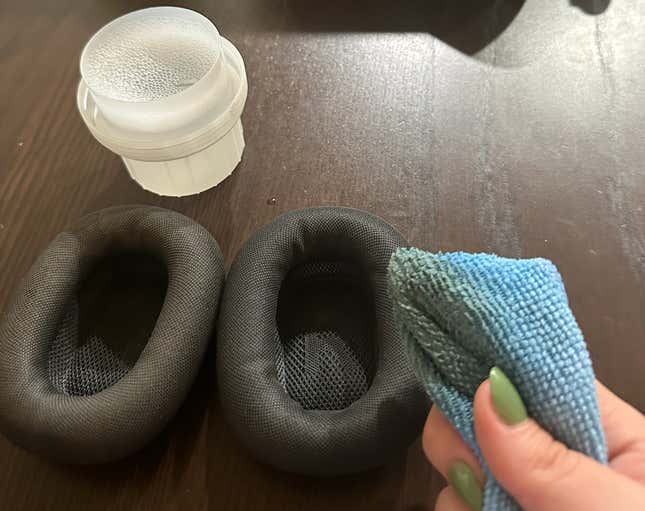
To avoid doing that, it’s best to clean the headband while holding the device upside down, so any water trickle goes away from the headphones themselves. Start by mixing one teaspoon of liquid laundry soap and one cup of water in a container, dampen a cloth with it, and rub it on the headband gently for one minute. It’s harder to keep it upside down while you do the outer part of the headband, but don’t skimp: Even the outer part of mine was dirtier than expected. Do the same to each cushion. Yes, all you do is rub them with the detergent-damp rag. Don’t soak them. When I did that, makeup that was deep in the cushions came out on the cloth, so be sure you scrub a long time.
Go back with a dry cloth and rub them again to dry them. Lay them out for a day before reattaching them—making sure to note the R and L imprinted within the right and left cushion, respectively—and you’re good to go.
