
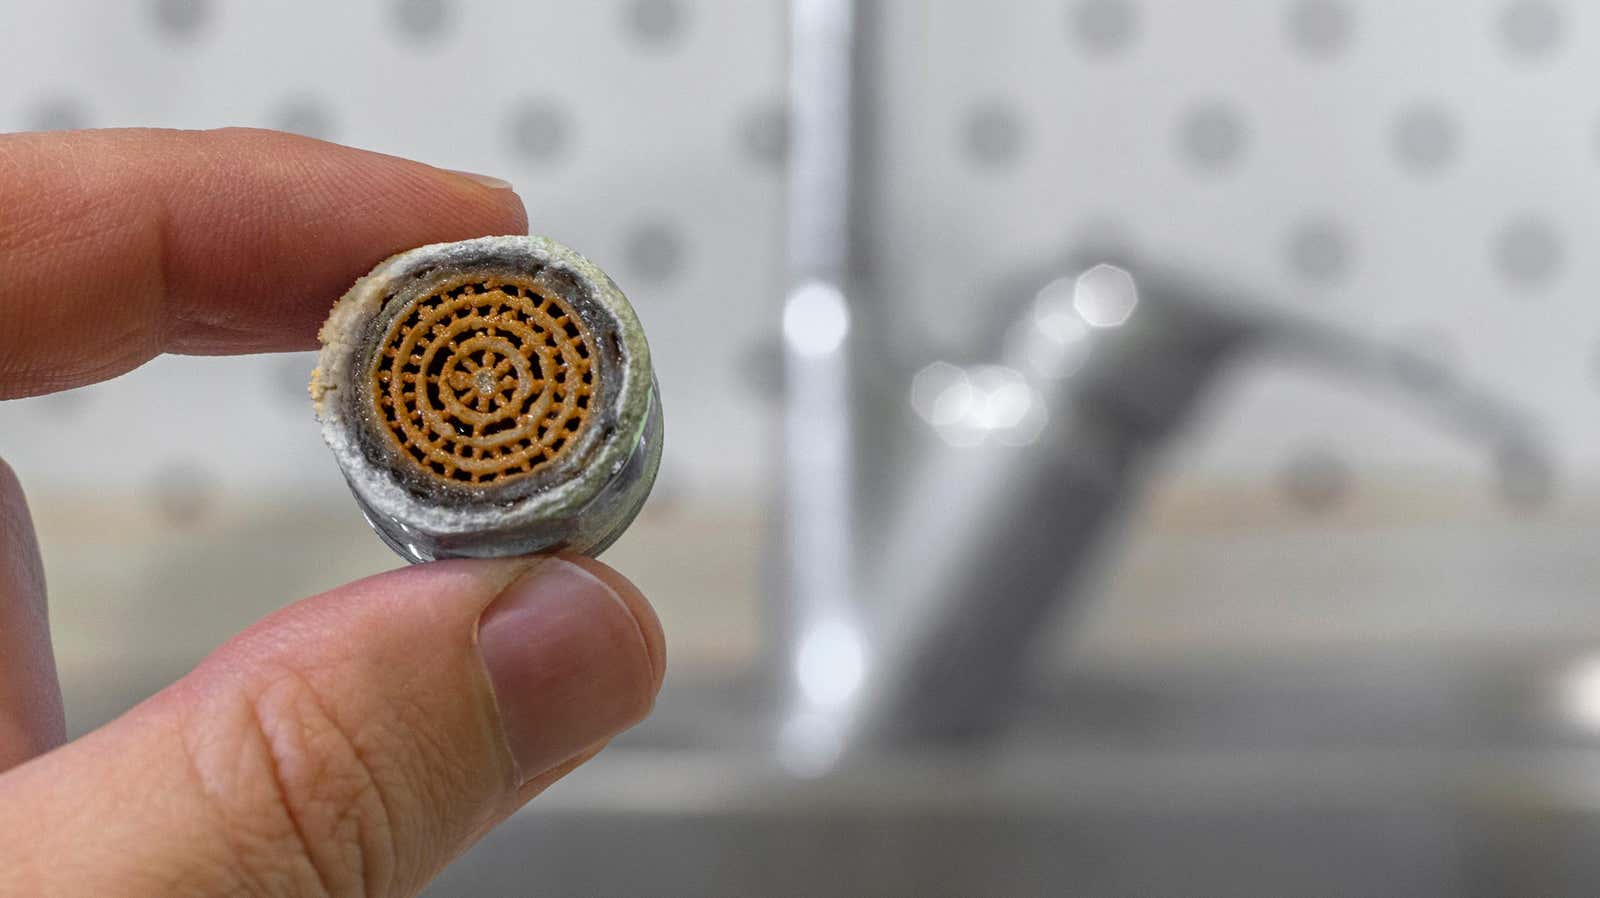
Take a look at the bottom of the faucet on most modern kitchen and bathroom sinks, and you’ll probably see a small, round screen called an aerator. This thin piece of metal helps to control the water as it comes out of the faucet by adding air—which reduces splashing and water usage.
Aerators also act as a filter of sorts, catching debris that’s still in the water. And over time, that gunk, along with mineral deposits and other build-up, can make the aerator less effective. Fortunately, cleaning it isn’t difficult. Here’s what to do.
How to clean faucet aerators
Table of Contents
In order to clean an aerator, you first must remove it from the faucet. Aerators that screw onto the outside of the faucet usually can be removed by hand, though you may need to loosen it up a bit first with pliers or a wrench.
Other aerators—known as “hidden” or “recessed” aerators—screw into the inside of the faucet, and require a small key to remove. If this is the case for yours, and the faucet is relatively new, a key may have come with it. If not, you should be able to find one at a hardware or plumbing supply store.
When the aerator is off the faucet, start by soaking it in a glass of white vinegar for about five minutes. After that, scrub it with a small brush (like an old toothbrush) to remove any debris or mineral deposits that remain. If the vinegar didn’t do the trick, you can try soaking the aerator in a mixture of citric acid and water instead. Once it’s clean, you can put the aerator back on the faucet.
G/O Media may get a commission
Ideally, you should clean your aerator every six months, as well as after after any construction work that affects water service.